Easy Nail Art for Beginners: 20 Designs for Short Nails
If you can paint a clean coat of polish, you can do every design on this list. These 20 easy nail art designs for beginners are all on short nails and use basic tools: a dotting tool (or a bobby pin), a thin liner brush, striping tape, a makeup sponge, stickers and a few special top coats.
The ideas are grouped by technique, starting with dots (the easiest) and moving through lines, French tips, sponge gradients, stickers, matte, cat eye and chrome. Many of the examples happen to be in winter shades like green, red, navy and icy blue, but every technique works in any color, so you'll find a year-round swap in most of the ideas.
Nail designs in this post are AI-generated illustrations for inspiration, not photos of real manicures. About our images
What You Need
- Base coat and glossy top coat (or gel base, gel top and an LED/UV lamp)
- A few polish or gel colors: a sheer pink or nude, white, black and one or two brights
- Dotting tool with two tip sizes (a bobby pin or toothpick works too)
- Thin striping (liner) brush and a roll of nail striping tape
- Makeup sponge for gradients and a small cleanup brush with remover
- Small nail stickers, fine glitter polish and a matte top coat
- Cat-eye gel with a nail magnet and chrome powder with a no-wipe gel top coat (optional, gel only)
Before You Start: 5 Basics That Make Nail Art Easier
- Keep every coat thinThin coats of base, color and art dry or cure evenly and won't drag when you add details. Two thin coats of color look better than one thick one, even if the first looks streaky.
- Let the base dry or cure firstWith regular polish, wait until the color feels dry to a light touch before adding dots or tape, or you'll dent it. With gel, cure the color first so you have a firm surface to work on.
- Practice on paper or a nail tipTry a row of dots or a line on paper, a clear nail tip or your non-dominant hand's thumbnail before the real thing. Five minutes of practice tells you how much polish to pick up.
- Clean your tool between dotsWipe the dotting tool or brush on a paper towel after every one or two dots. A clean tool makes round, same-size dots; a loaded one makes blobs.
- Float the top coatLoad the top coat brush and let it glide over the art without pressing, so dots and lines don't smear. With polish, wait until the art is dry first.
1. Tiny Black Polka Dots on Sheer Pink
- Difficulty: Easy
- Time: 25–30 min
- Polish or gel
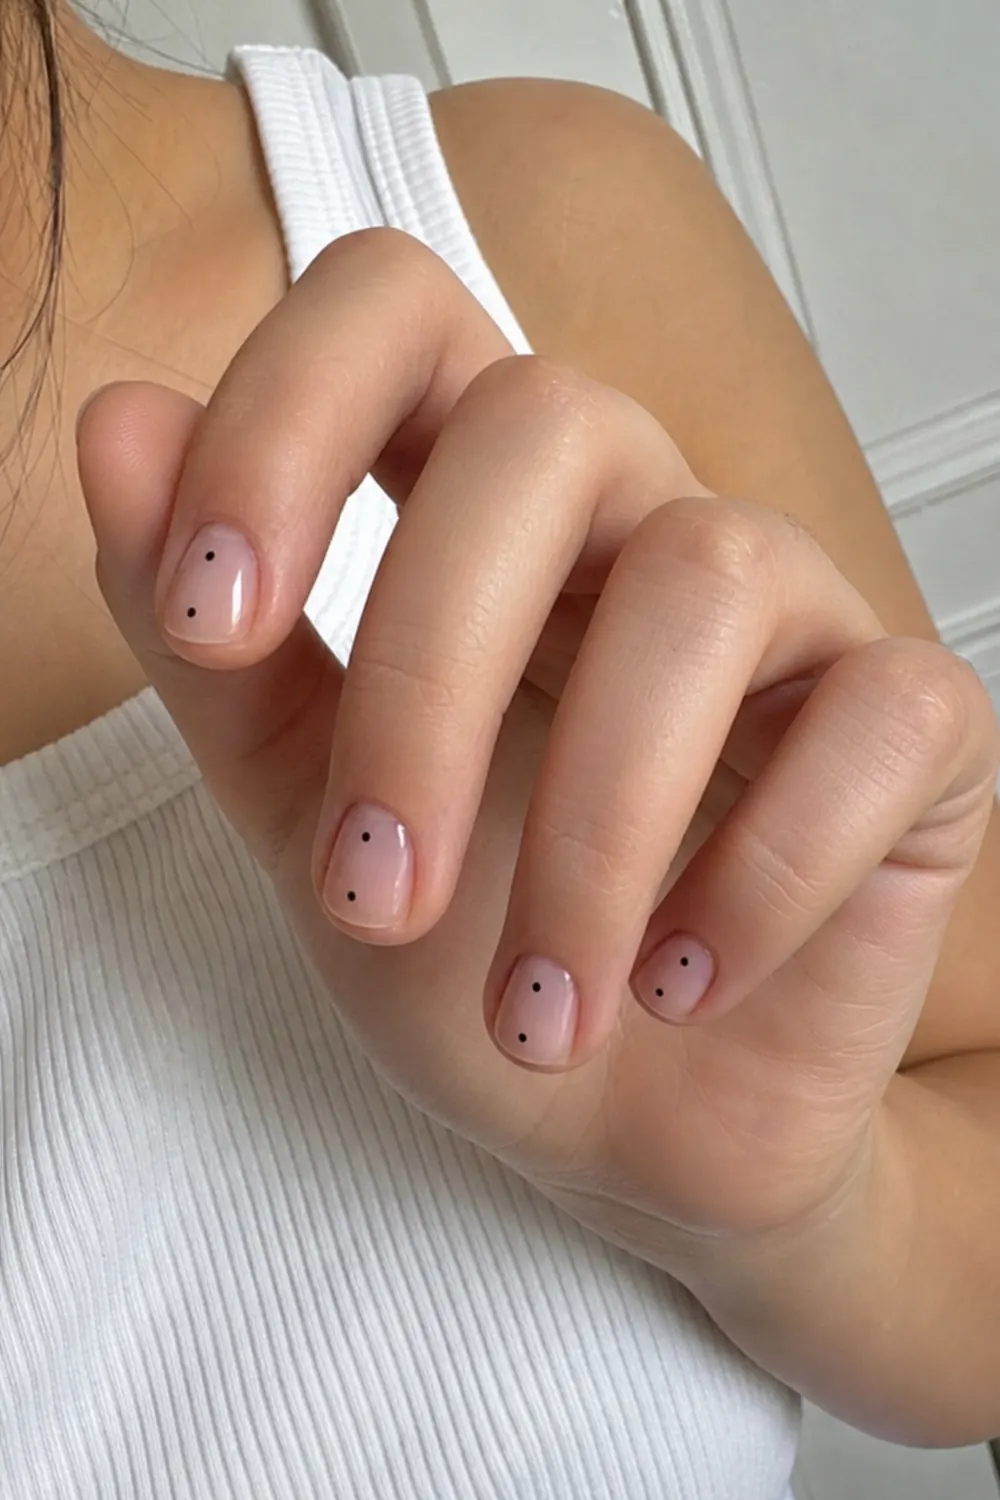
A sheer pink base with a few tiny black polka dots is the classic first nail art design. Use the smallest end of a dotting tool, dip it lightly in black polish and touch it to the nail without dragging. Spacing the dots unevenly looks intentional and hides any that come out a bit bigger.
2. One Tiny Red Dot at the Cuticle
- Difficulty: Easy
- Time: 20–25 min
- Polish or gel
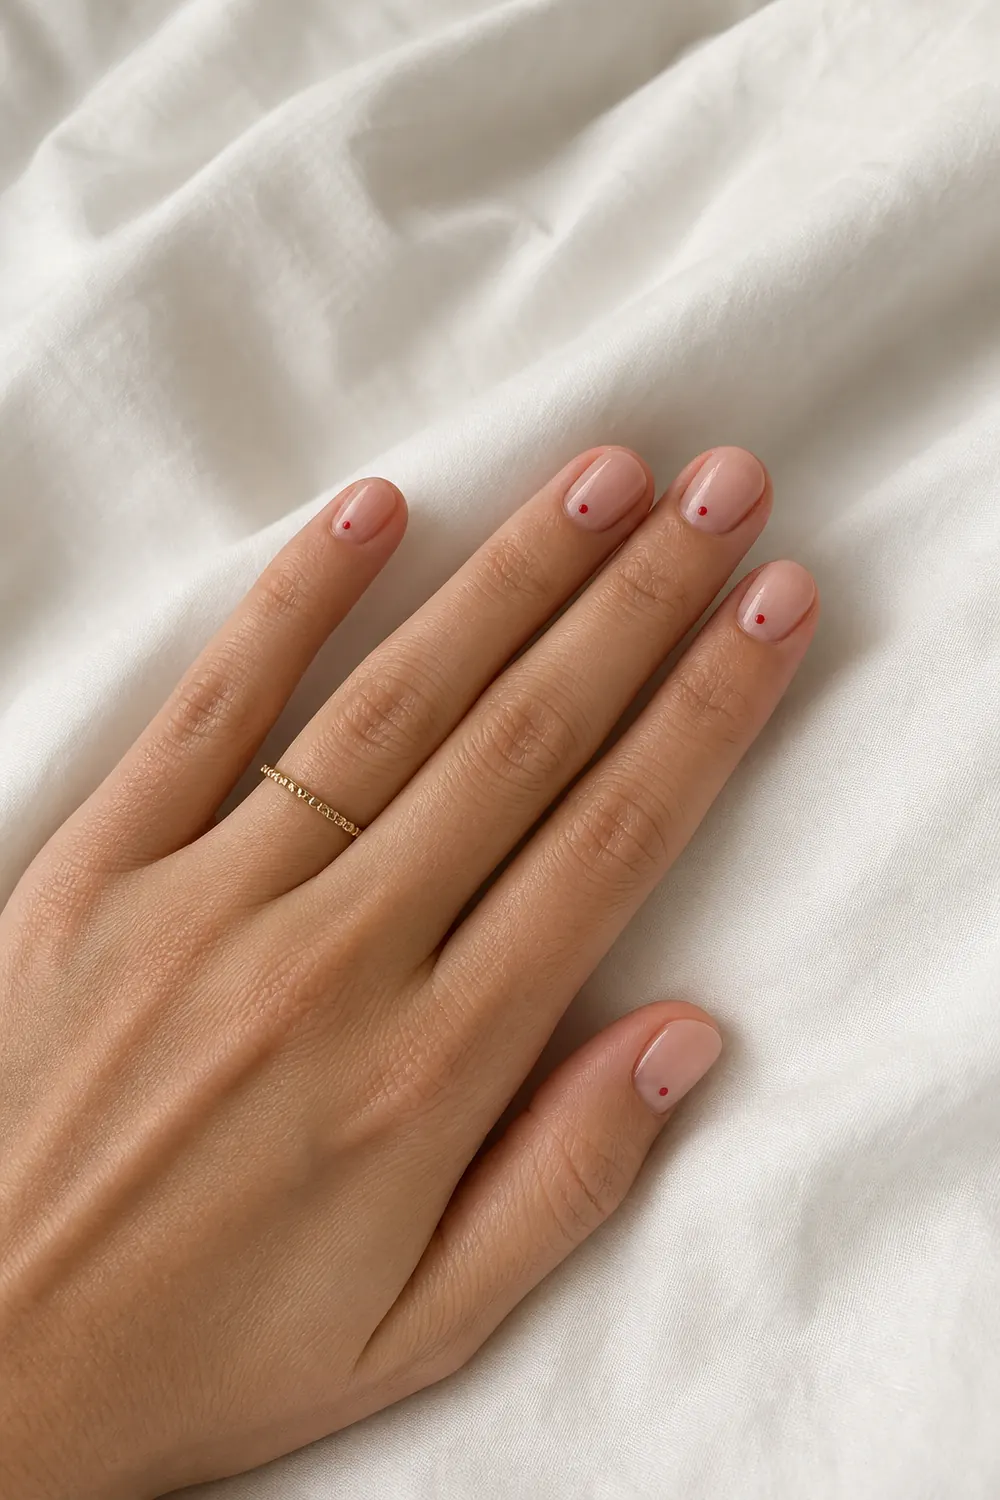
One tiny dot centered near the cuticle of each nail is about as minimal as nail art gets, and it's great practice for placing a dot exactly where you want it. Rest your painting hand's pinky on the table for support and place the dot slightly away from the skin. Swap red for coral or gold in summer.
3. Single Dot Ornaments on Milky White
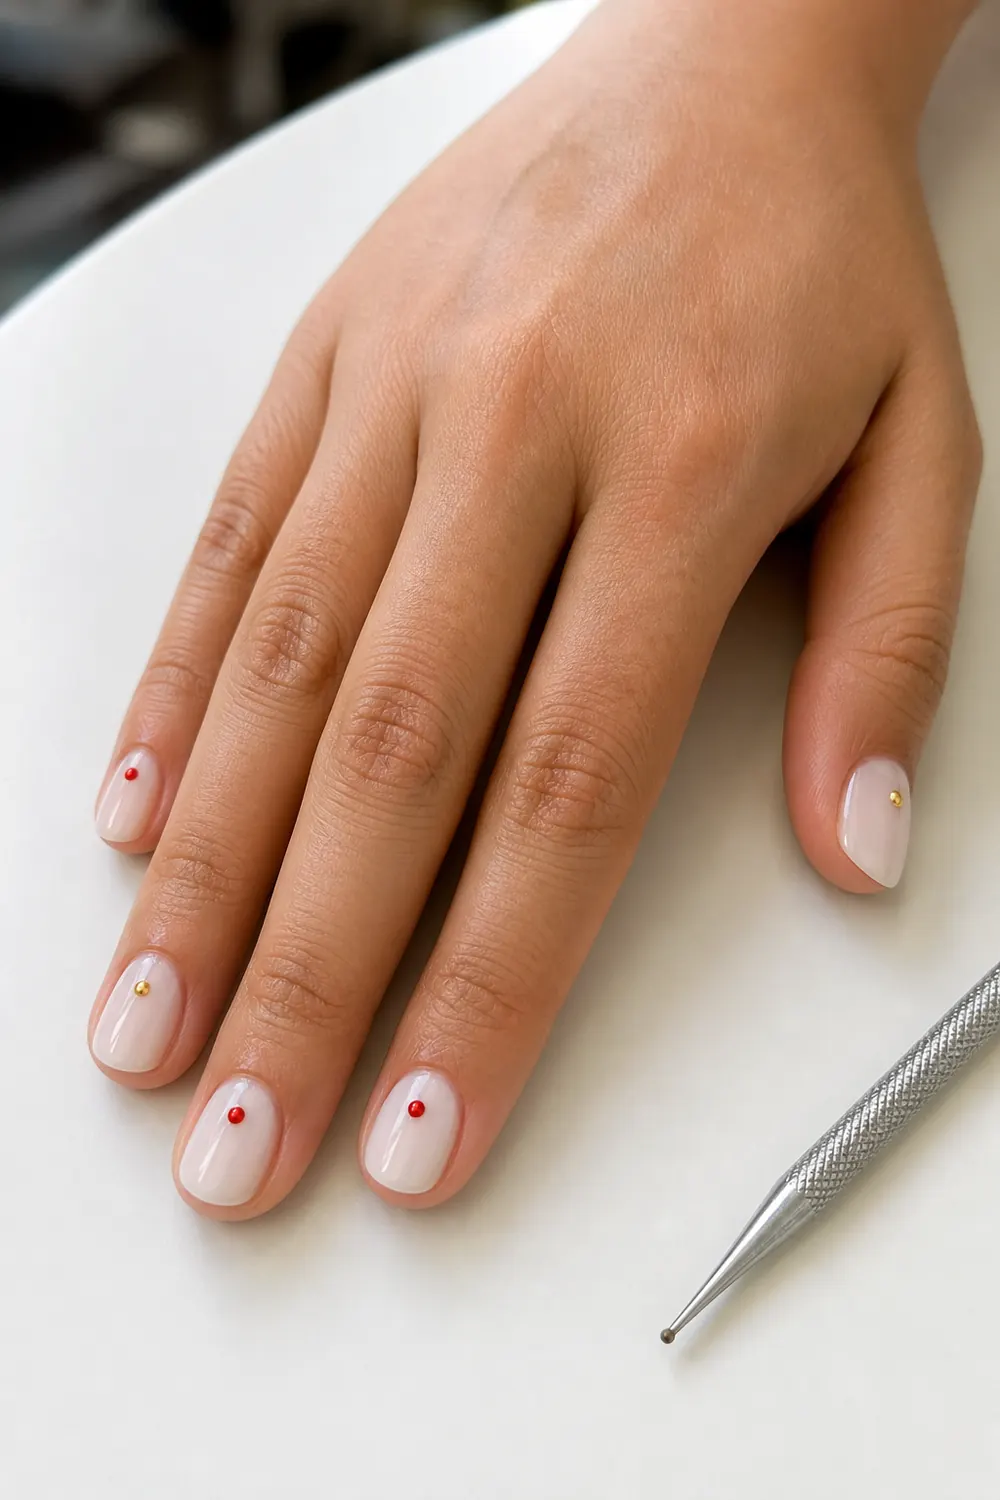
- Difficulty: Easy
- Time: 25 min
- Polish or gel
A milky white base with one slightly bigger dot per nail, alternating two colors, reads like tiny ornaments. Use the larger end of the dotting tool and put a fresh drop of polish on foil for each color so it doesn't thicken. Try pink and lilac for spring or navy and white for a nautical look.
4. Sage Green with Scattered White Dots
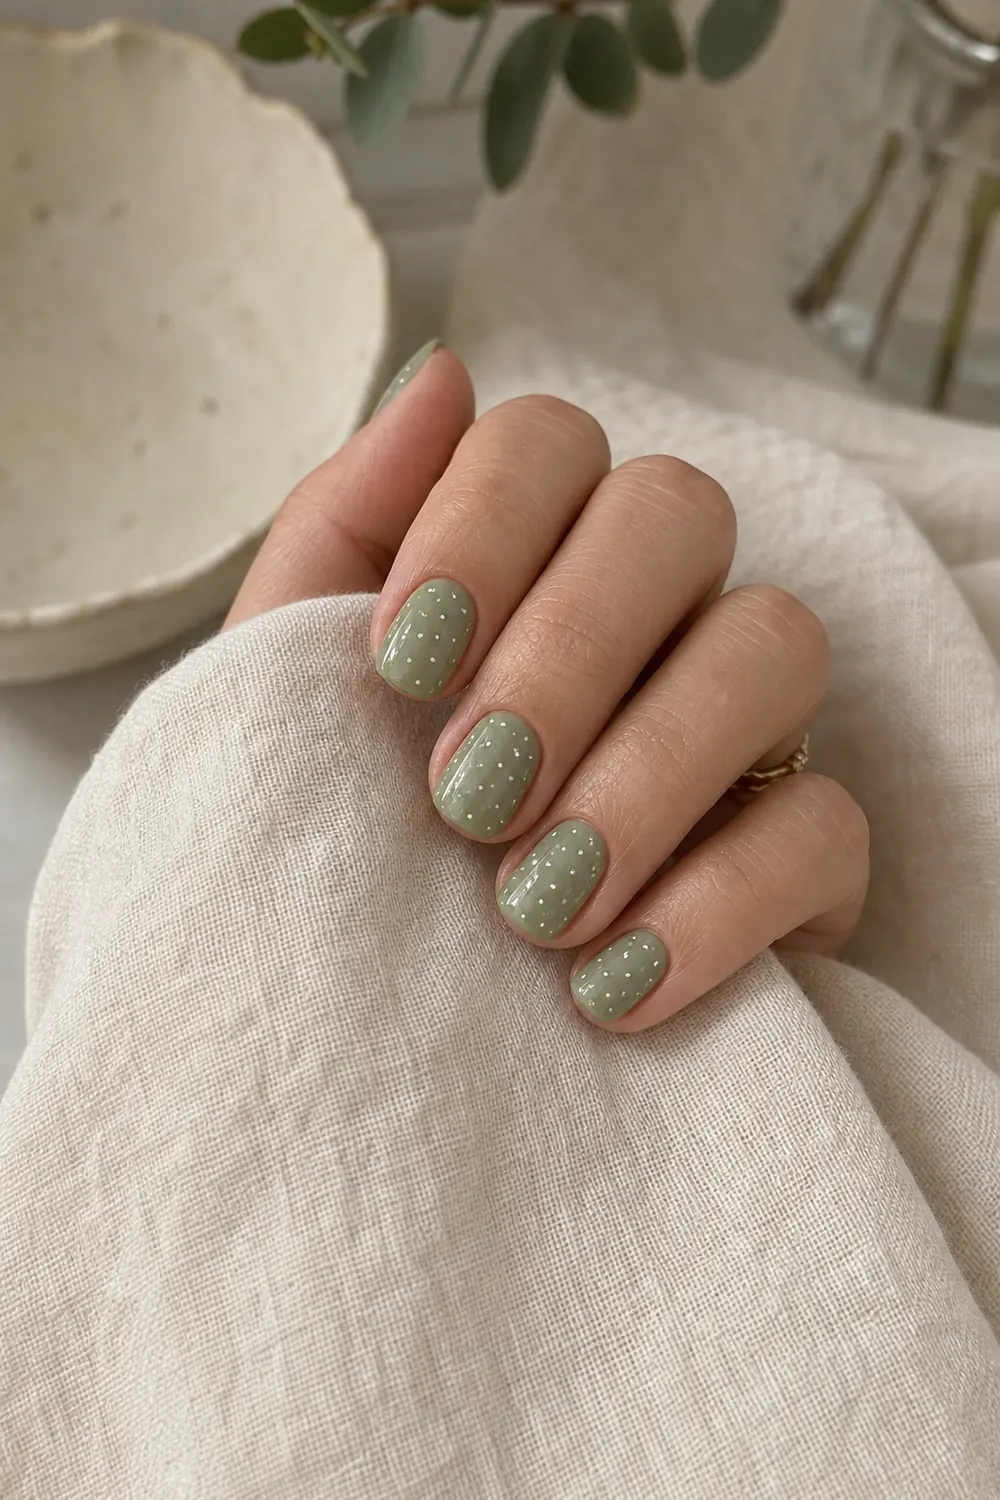
- Difficulty: Easy
- Time: 30 min
- Polish or gel
Tiny white dots scattered over soft sage green look like falling snow in winter and like a simple speckle the rest of the year. Use a toothpick for the smallest dots and vary the size a little. White polish thickens fast, so wipe the tool often.
5. Glossy Dots on a Matte Base
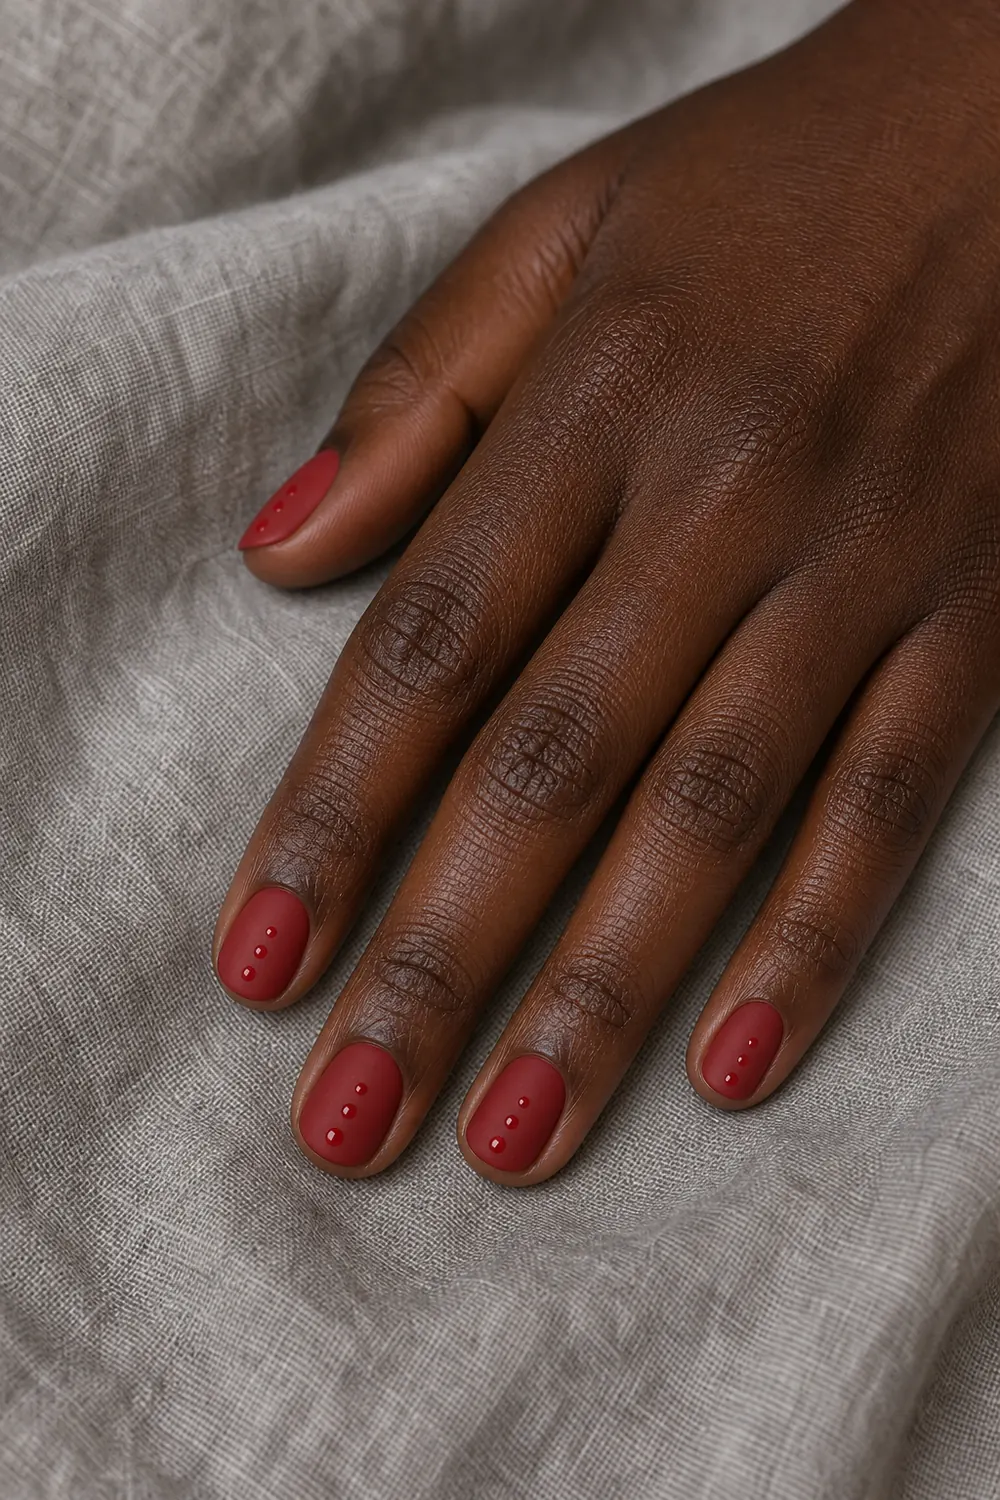
- Difficulty: Easy
- Time: 30 min
- Polish or gel
Same color, two finishes: paint the nails, apply a matte top coat, then add small dots of glossy top coat on top. The dots show up as shiny bumps, so the design looks detailed without any extra colors. It works in any shade, from black to blush pink.
6. Milky White Gel with Two-Color Dots
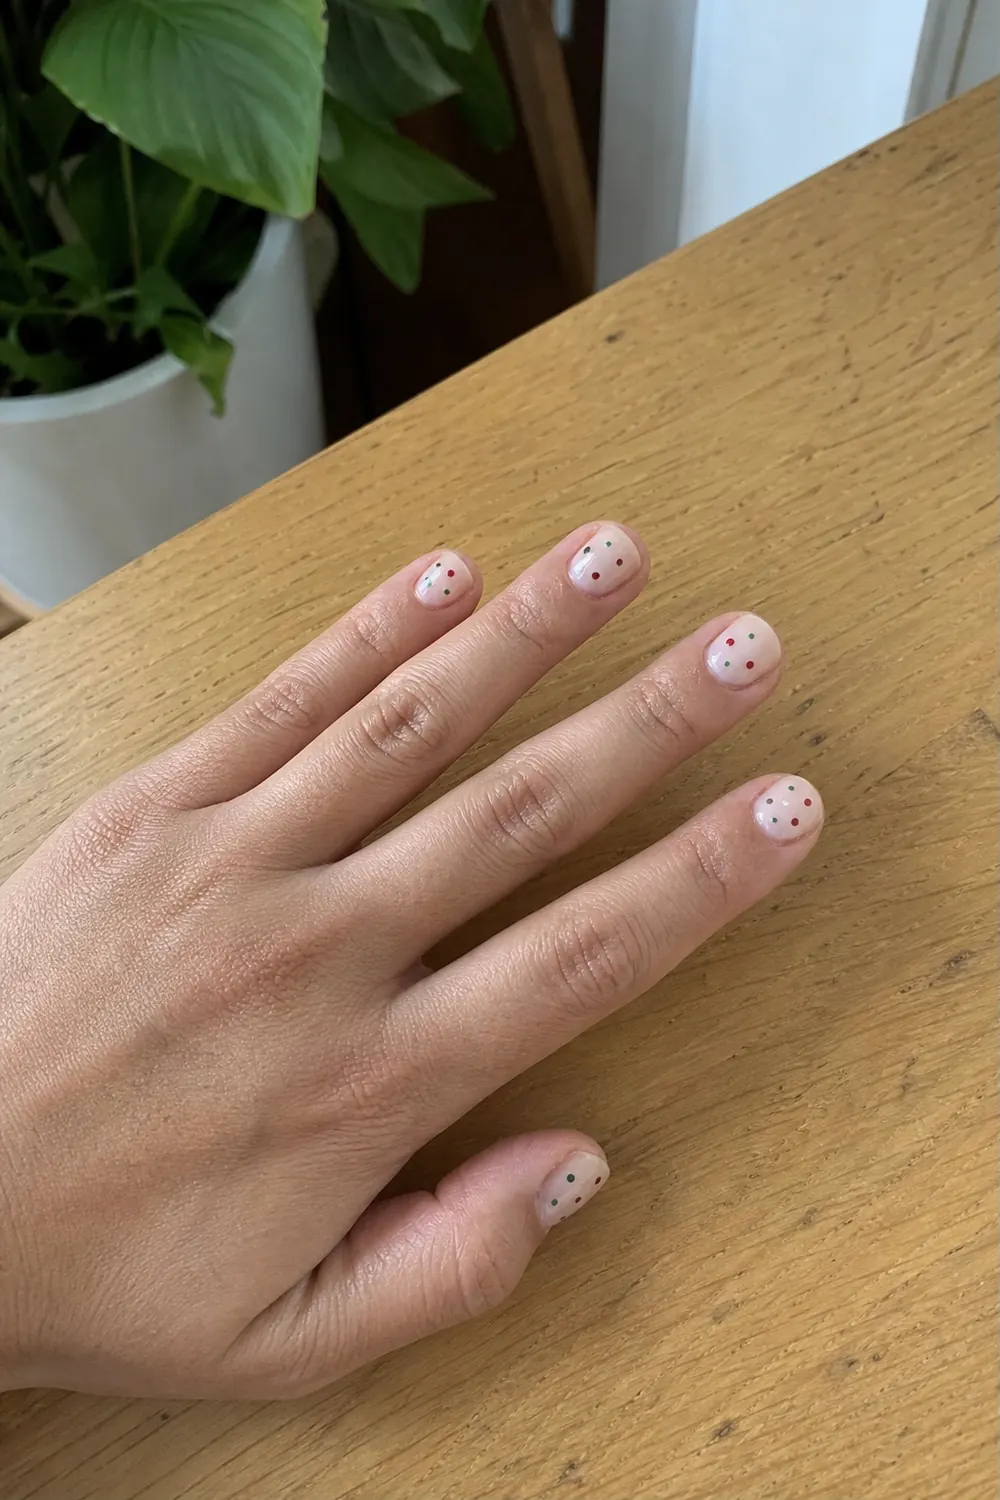
- Difficulty: Easy
- Time: 35–40 min
- Gel polish
A few small dots in two colors on milky white is a friendly first gel design. Gel doesn't dry until it's cured, so you can wipe off a dot you don't like and try again. For a year-round version, use pink and orange or two shades of blue.
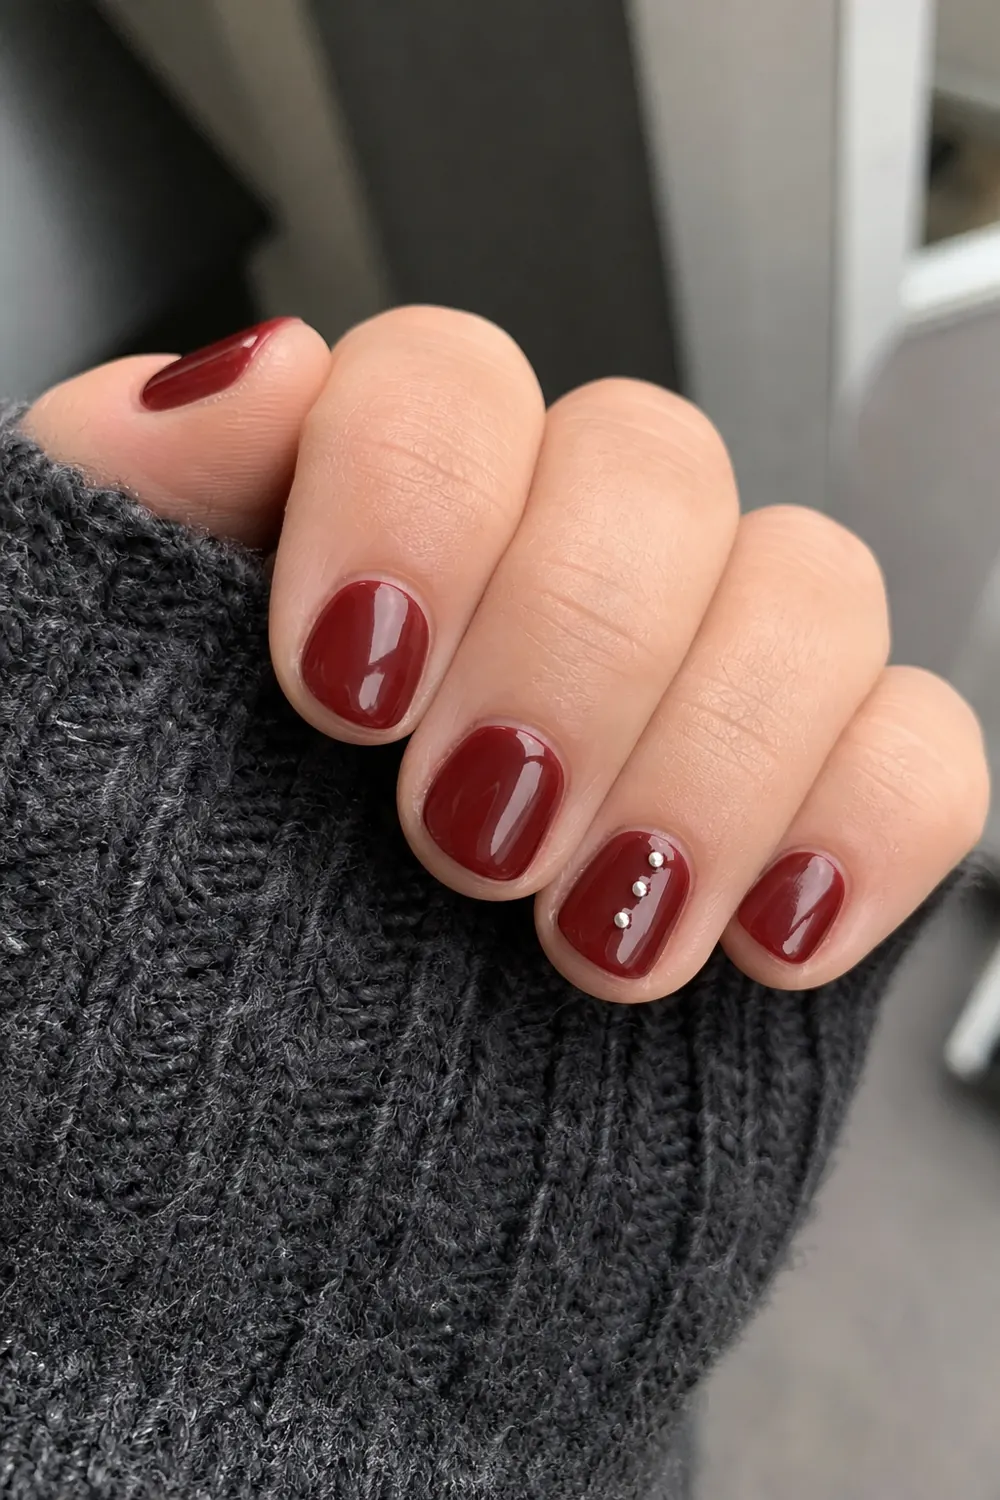
7. Wine Red with a Line of Silver Dots
- Difficulty: Easy
- Time: 25–30 min
- Polish or gel
Keep all nails in one deep wine red and add a short row of tiny silver dots on just the ring finger. Place the middle dot first, then one on each side, so the row stays centered. In warmer months, try the same idea with gold dots on a coral or terracotta base.
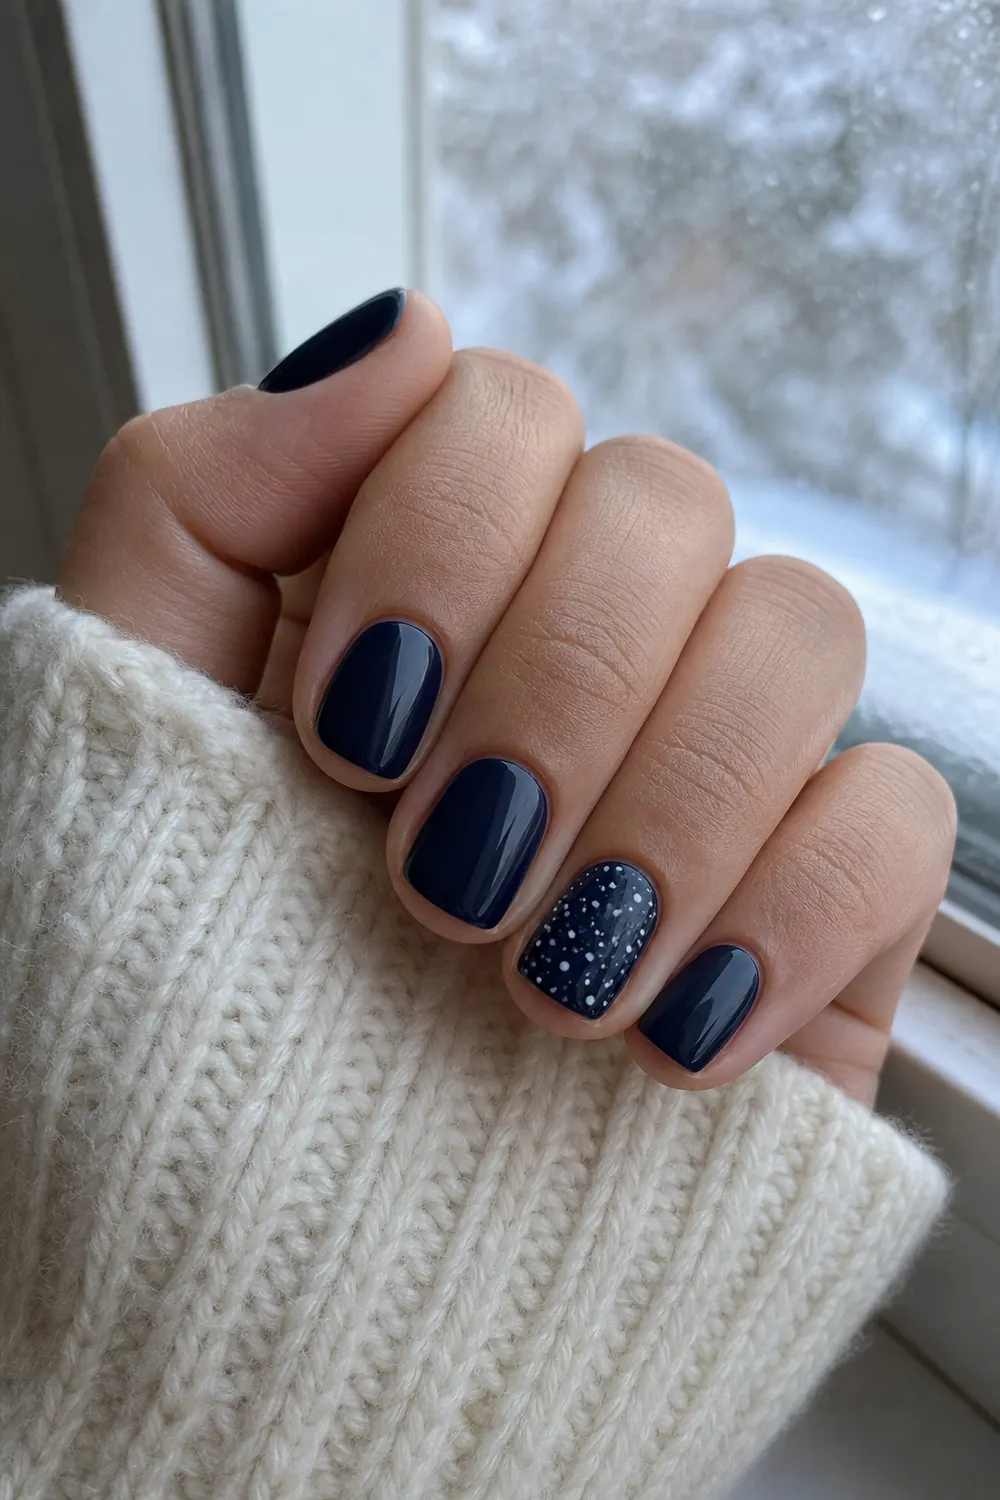
8. Navy Nails with a Snow-Dot Accent
- Difficulty: Easy
- Time: 25–30 min
- Polish or gel
Midnight navy on every nail with scattered white dots on one accent nail is an easy way to practice dots without doing a full set. Use two dot sizes and keep the dots away from the edges so they don't get cut off. Navy with white dots also works as a crisp summer look.
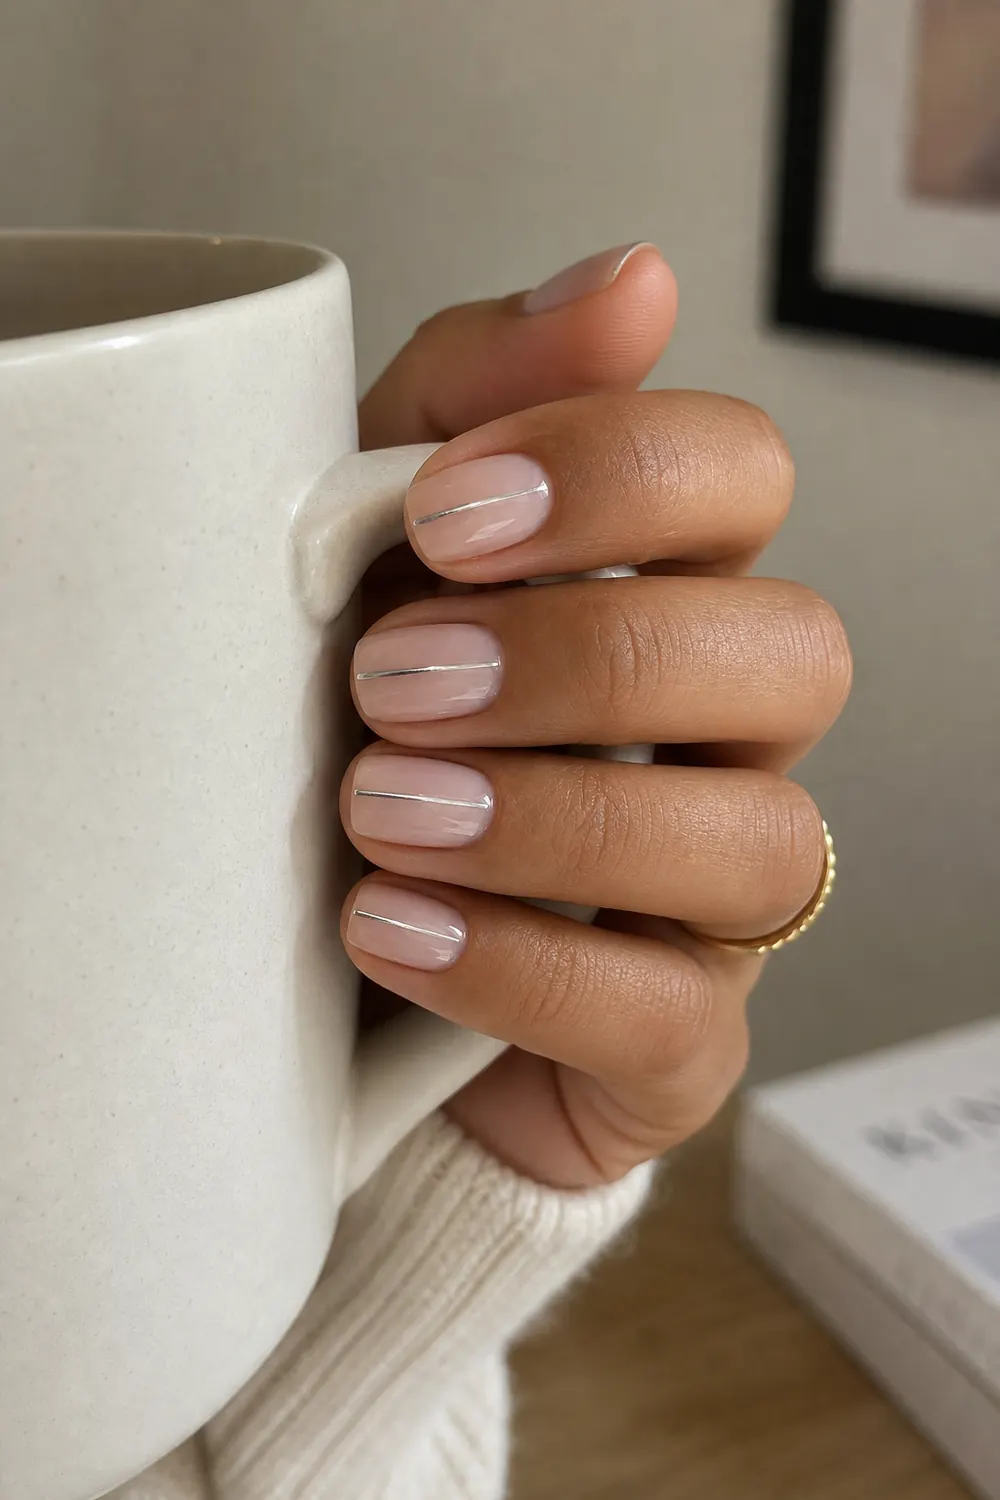
9. Sheer Pink with One Thin Silver Stripe
- Difficulty: Easy
- Time: 30 min
- Polish or gel + striping tape
One thin vertical stripe down the middle of each nail makes short nails look a little longer. The easiest way is striping tape: press a strip down the center of the dry base, paint over it with silver, then lift the tape while the polish is still wet. With a liner brush, pull the line from cuticle to tip in one stroke.
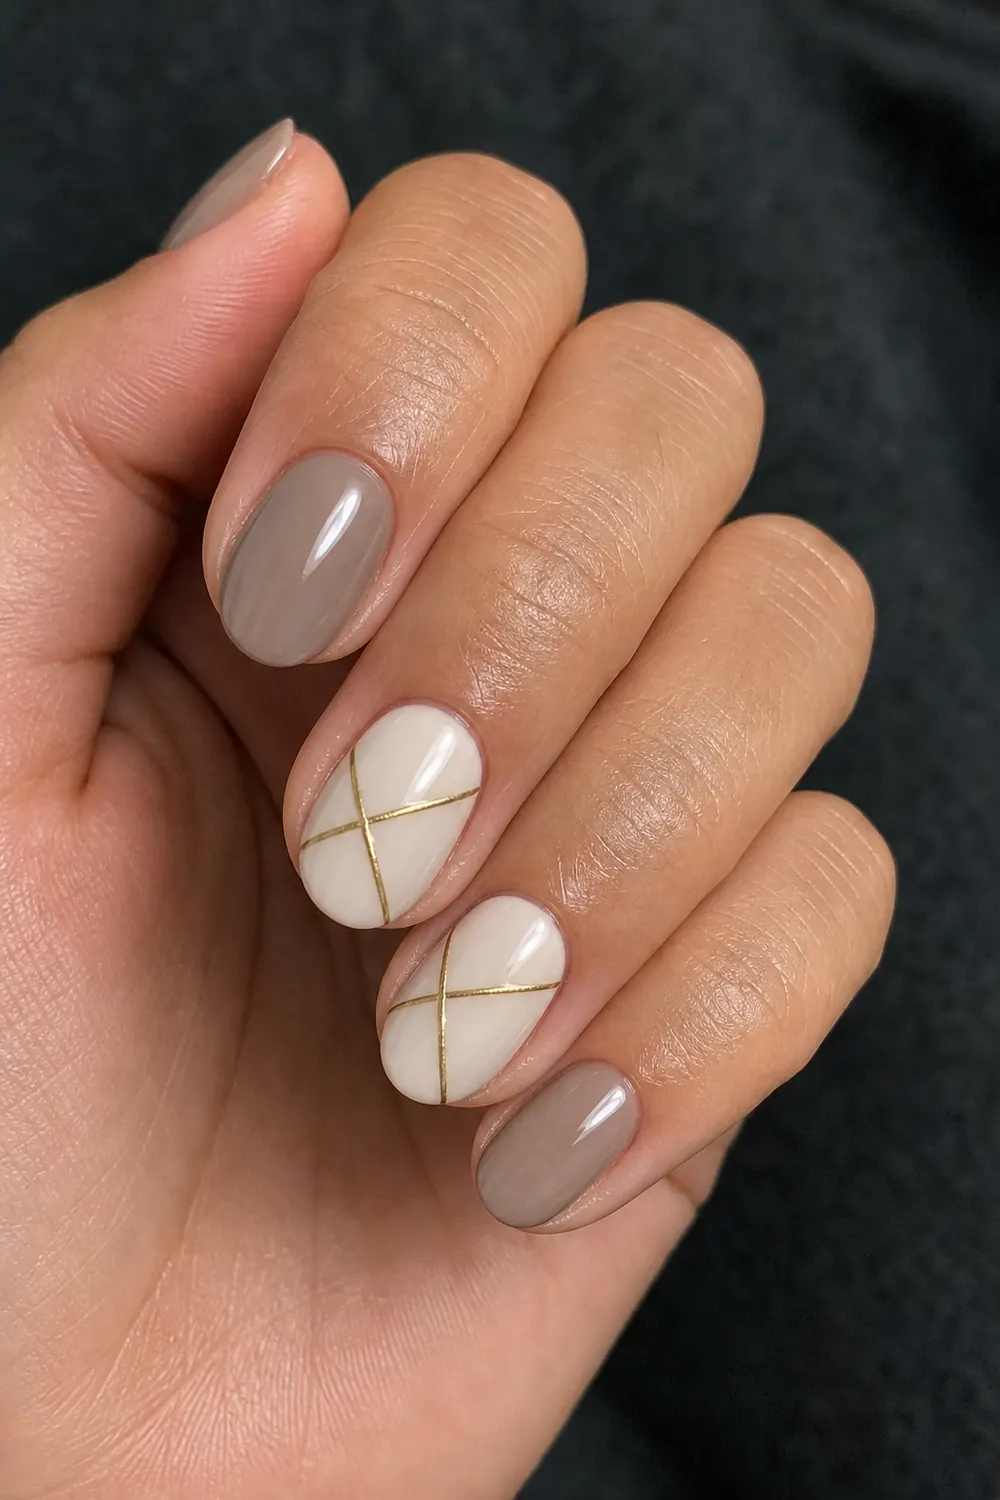
10. Greige and Cream with Thin Gold Lines
- Difficulty: Easy-medium
- Time: 35 min
- Polish or gel + striping tape
Alternate greige and cream nails, then add a few thin crossing gold lines on a couple of the cream ones. Gold striping tape is the beginner shortcut: cut short pieces, press them on and trim the ends at the free edge, then seal with top coat. Lines that cross at an angle look modern and don't need to be perfectly even.
11. Thin Black French Tips
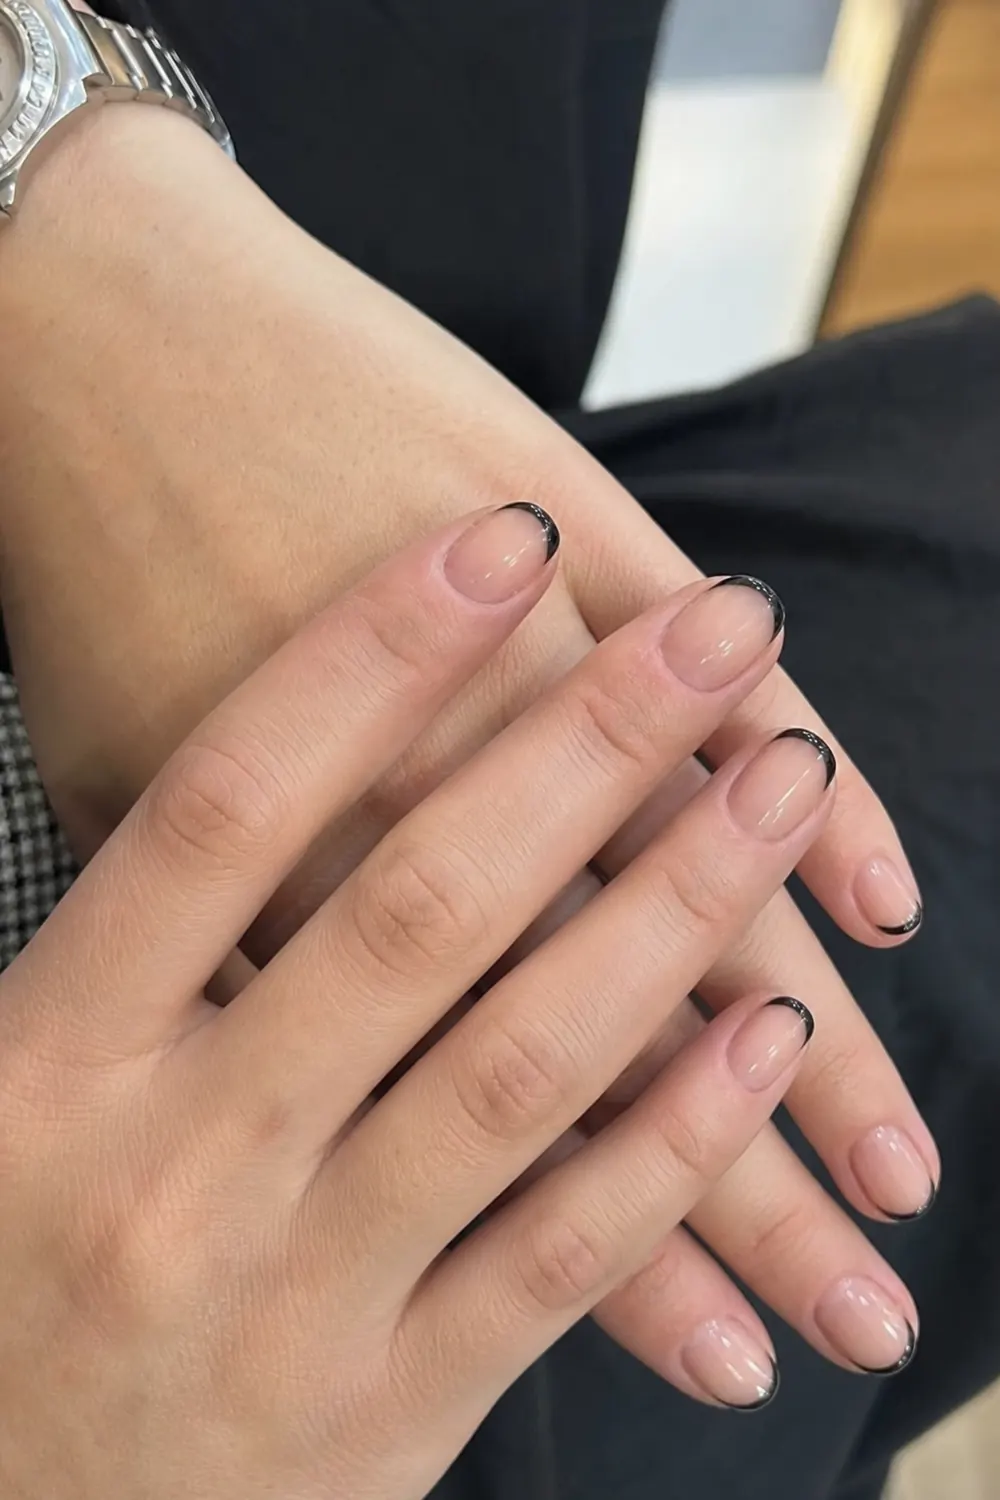
- Difficulty: Easy-medium
- Time: 30 min
- Polish or gel
Black French tips on a clear nude base are a sharp twist on the classic French manicure. Paint the tip with a liner brush, following the curve of your free edge, and keep it thin so short nails don't look shorter. Clean the inner line with a small brush dipped in remover before it dries.
12. Very Thin Deep Green French
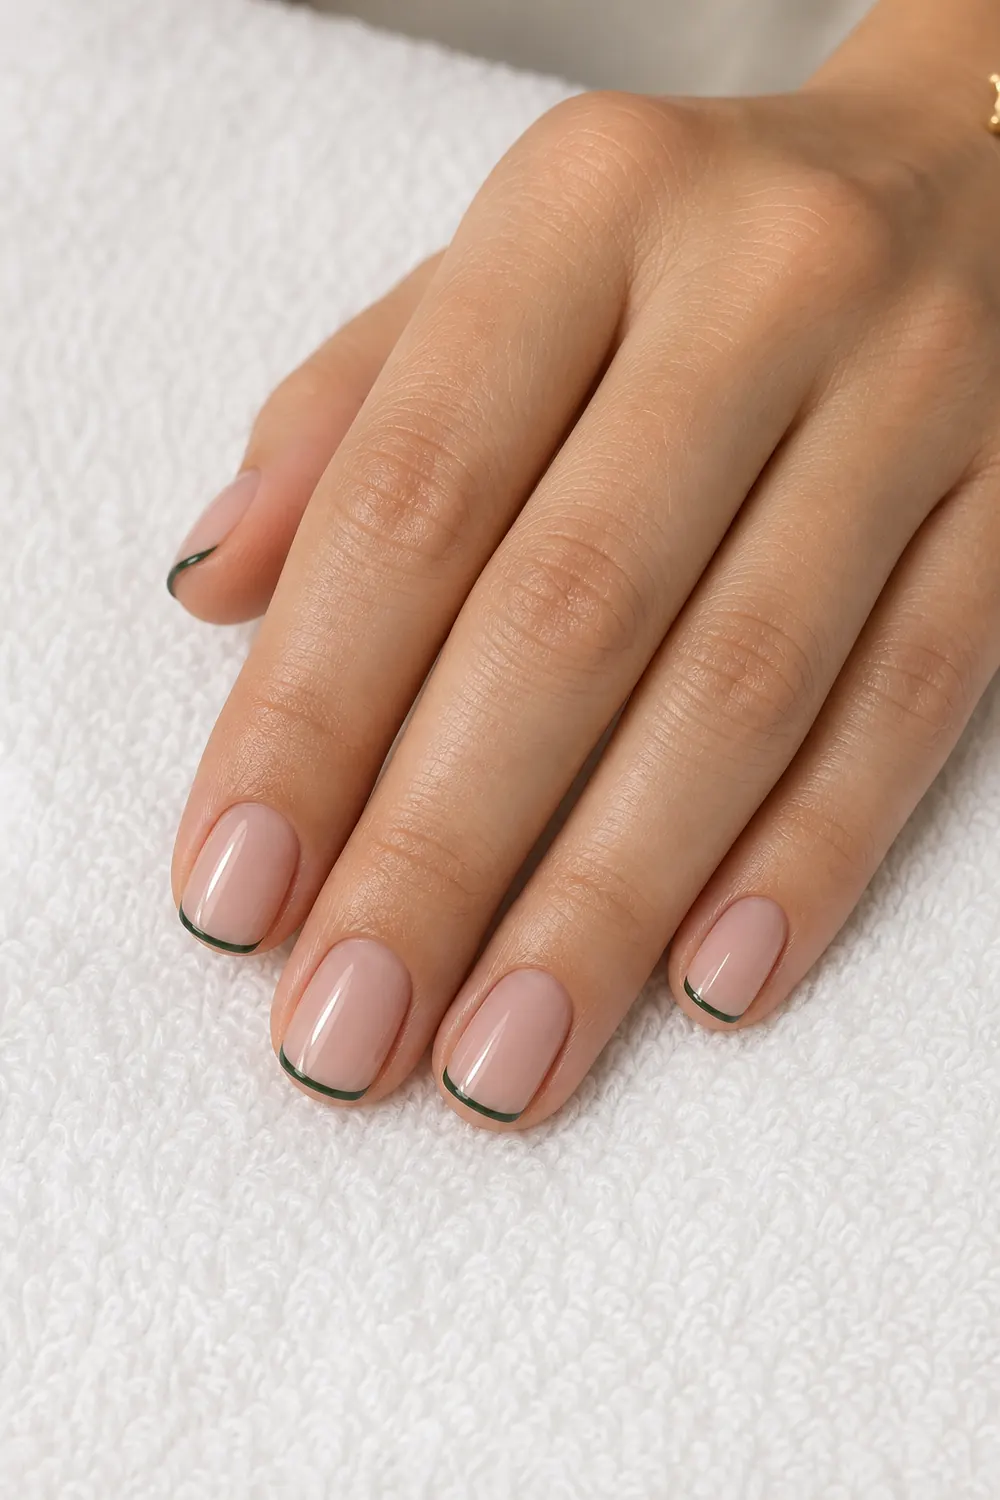
- Difficulty: Easy-medium
- Time: 30 min
- Polish or gel
A very thin green tip on a sheer pink-beige base is softer than black and easy to wear every day. If freehand feels hard, place a piece of striping tape just below the tip as a guide, paint the tip and remove the tape while it's wet. Swap green for sky blue or lilac for spring.
13. Dotted French Tips in Two Colors
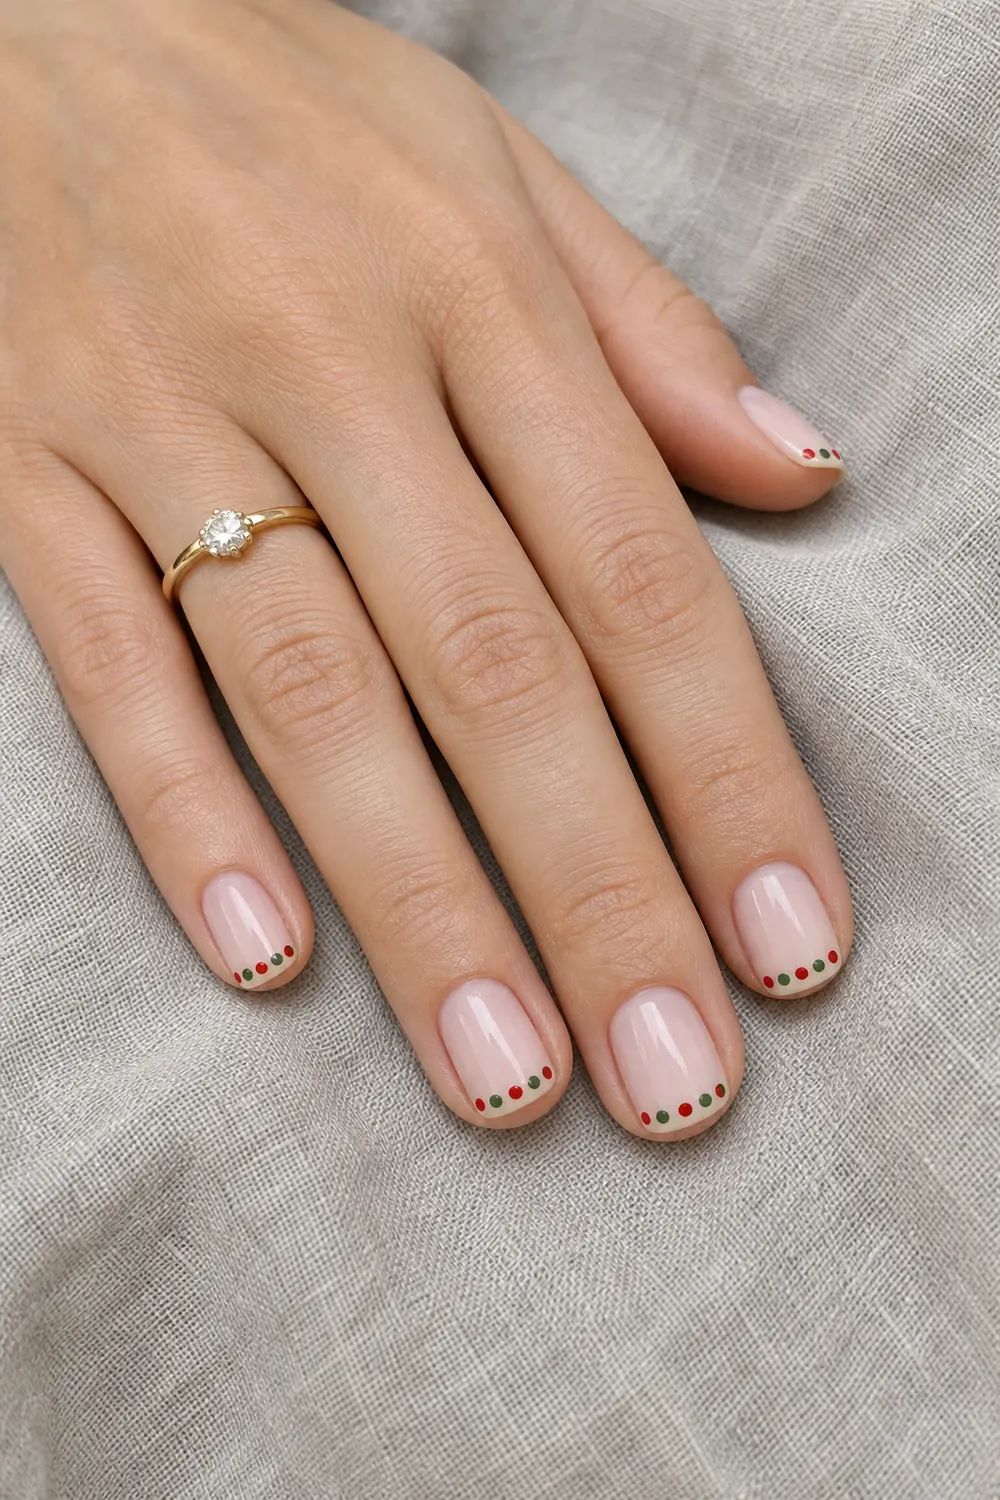
- Difficulty: Easy-medium
- Time: 35–40 min
- Polish or gel
Instead of painting a tip, line up small dots along the free edge, alternating two colors. Start with one dot in the center of the tip and work out to each side. It's a forgiving way to get a French look, and pink and white or yellow and orange dots make easy warm-weather versions.
14. Milky White with Silver Glitter Tips
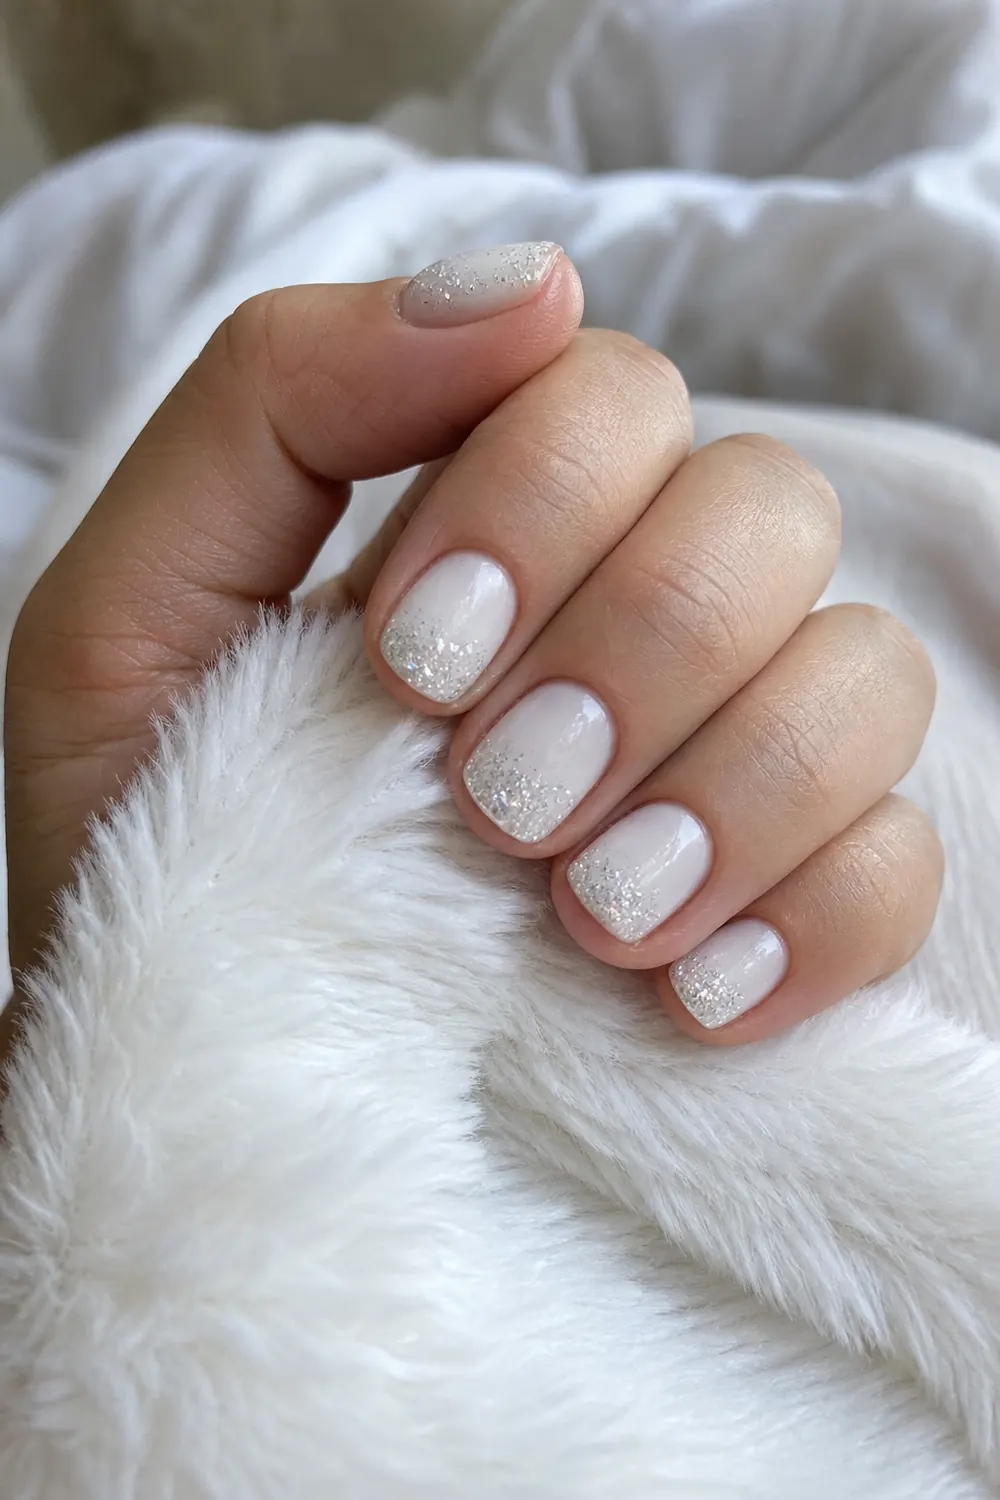
- Difficulty: Easy
- Time: 30 min
- Polish or gel + glitter polish
Fine silver glitter at the tips of milky white nails looks like frost and hides an uneven tip line. Dab glitter polish on the tip with the brush, then dab a little less just below it so it fades toward the middle. Gold glitter on a nude base is a nice year-round swap.
15. Icy Blue Sponge Ombre
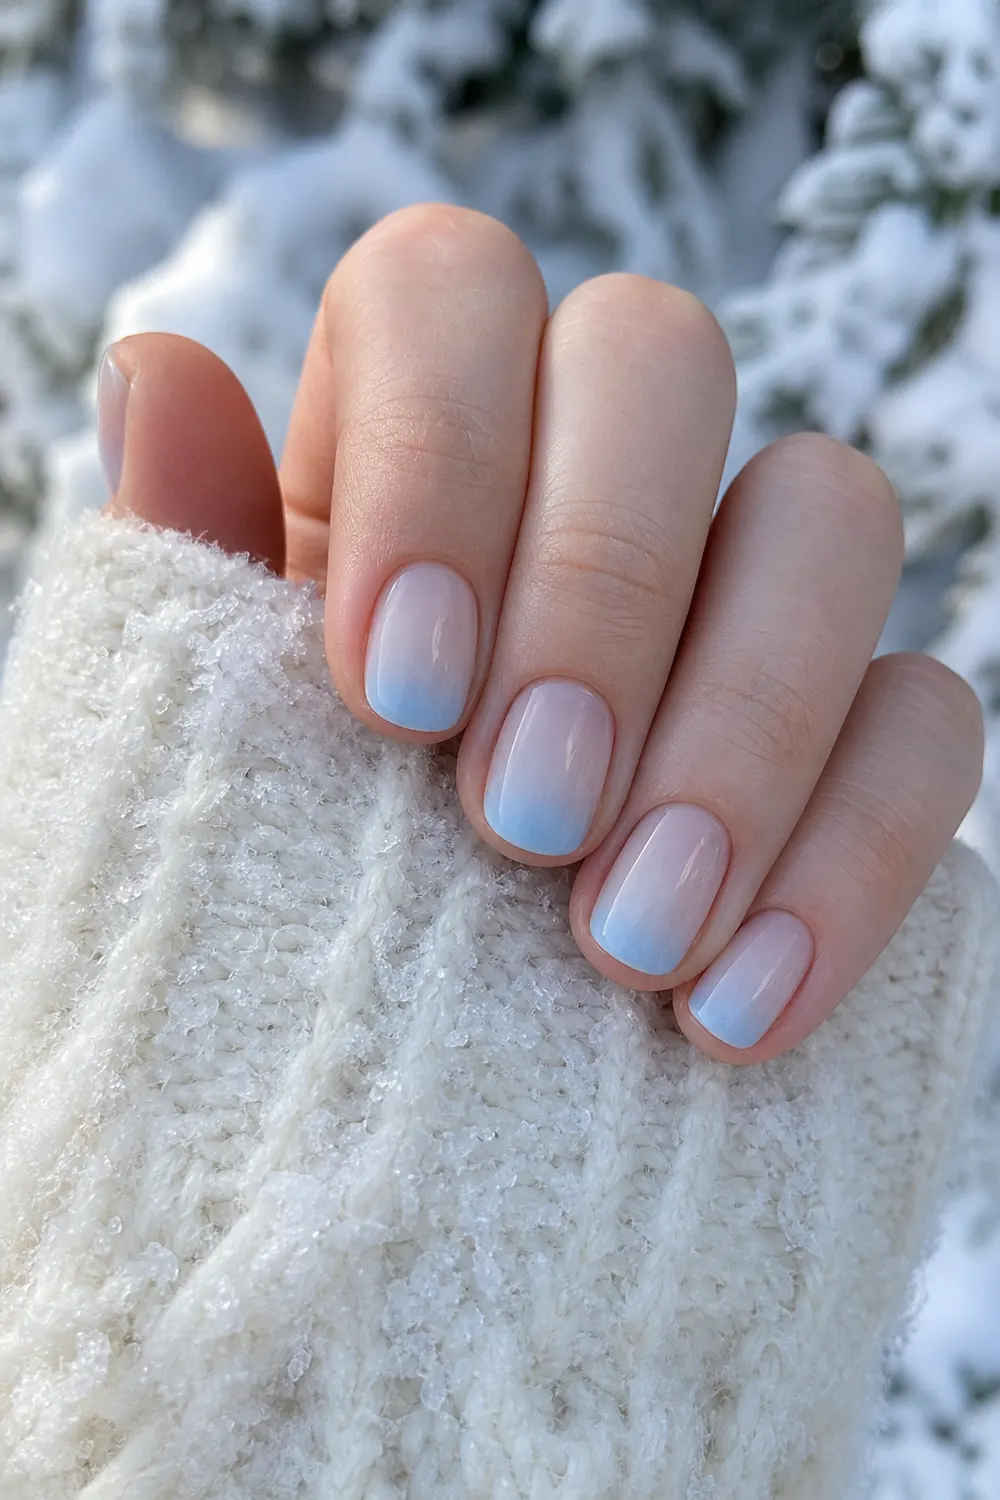
- Difficulty: Easy-medium
- Time: 40 min
- Polish or gel + makeup sponge
This gradient goes from sheer nude at the cuticle to pale icy blue at the tips. Paint a stripe of blue on the edge of a makeup sponge, dab it on the top half of the nail, and repeat once or twice to build color at the tip. Put liquid latex or tape around the nail first to make cleanup easy, and try peach or mint for summer.
16. Sheer Nude to Red Ombre
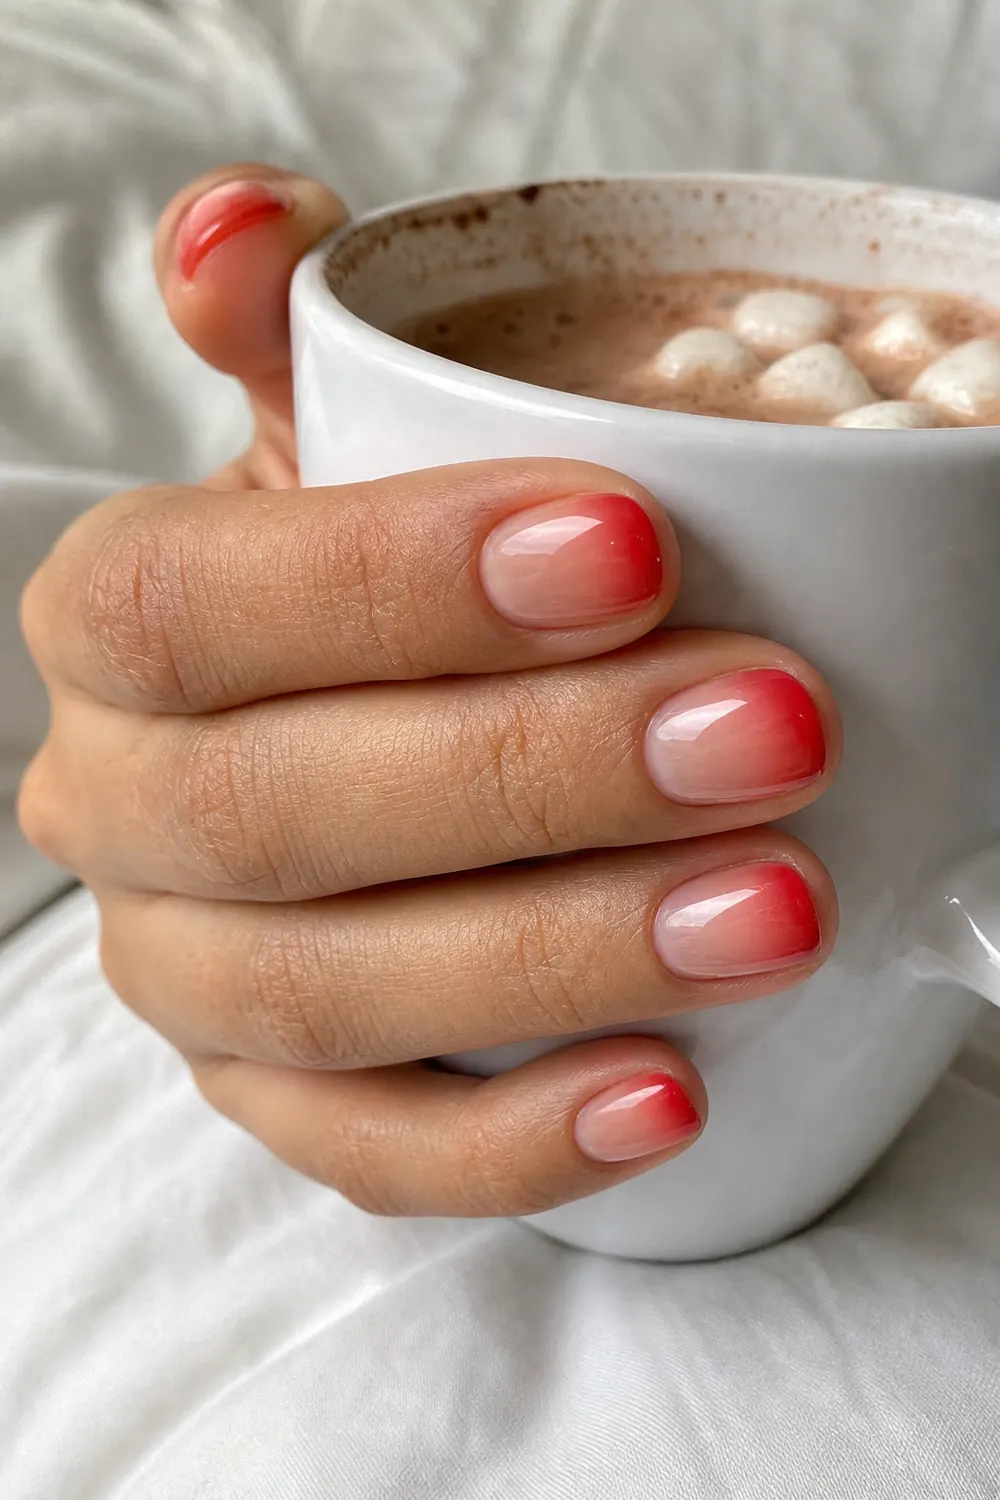
- Difficulty: Easy-medium
- Time: 40 min
- Polish or gel + makeup sponge
A soft fade from nude to glossy red uses the same sponge method as the icy blue ombre. Dab lightly and work in thin layers, since red builds quickly. A glossy top coat smooths out the sponge texture, and coral or hot pink give the same look a summer feel.
17. Gold Bow Sticker Accent on Sheer Pink
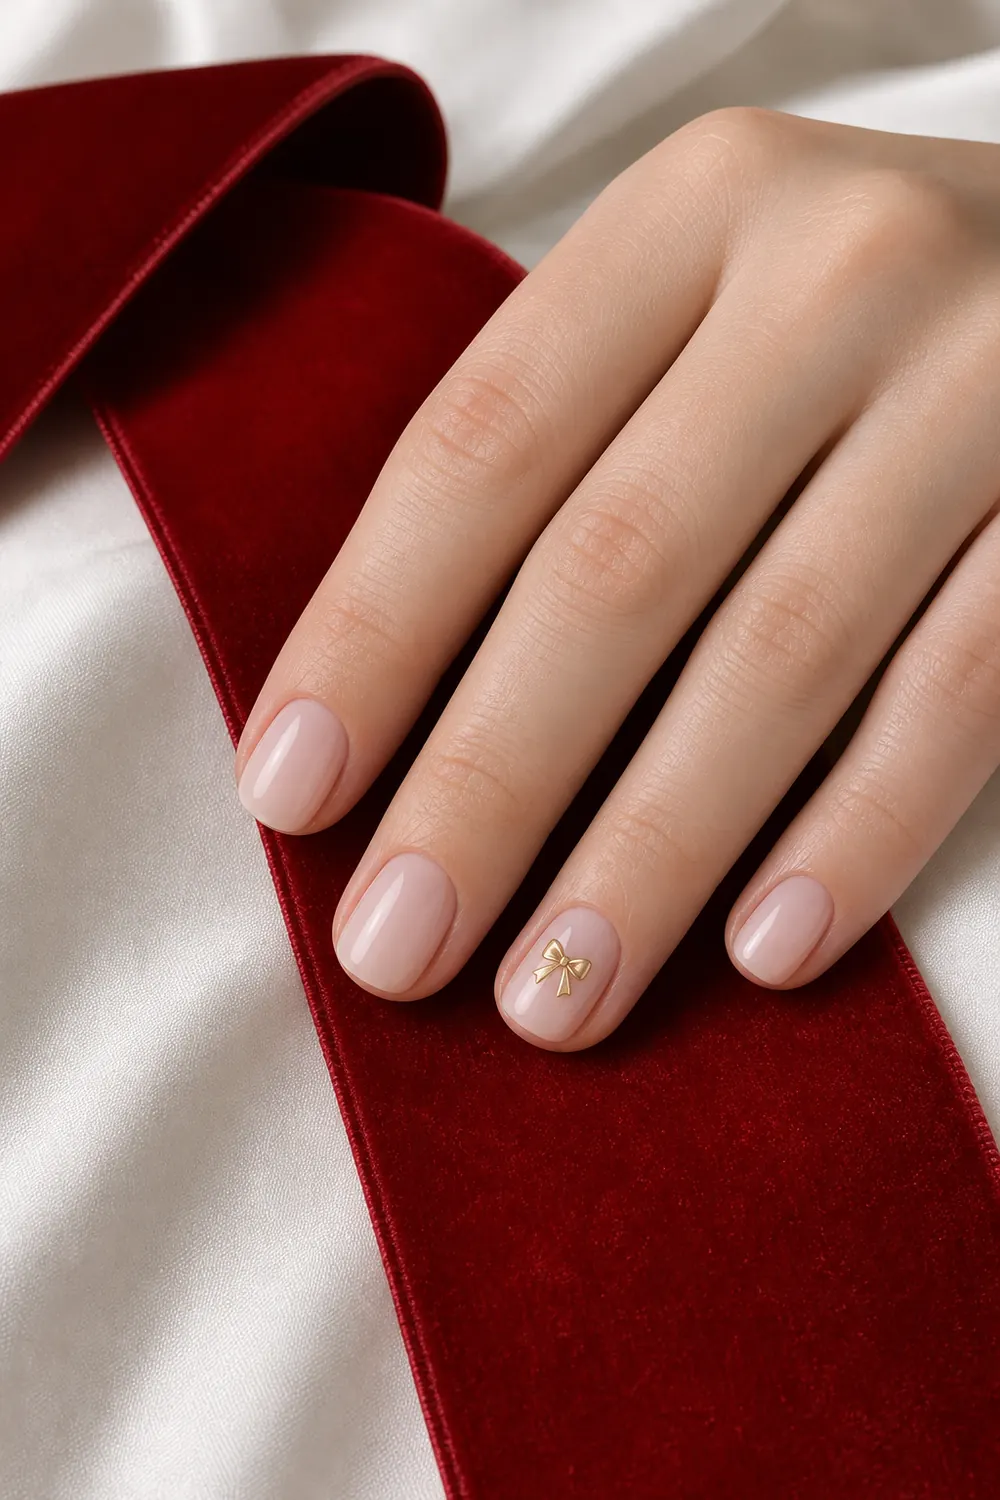
- Difficulty: Easy
- Time: 20 min
- Polish or gel + nail stickers
Nail stickers are the fastest way to get detailed art without painting it. Lift a small bow sticker with tweezers, press it onto a dry base on your ring finger and smooth the edges. Seal with two thin layers of top coat so the sticker doesn't catch.
18. Matte Charcoal Gray Square Nails
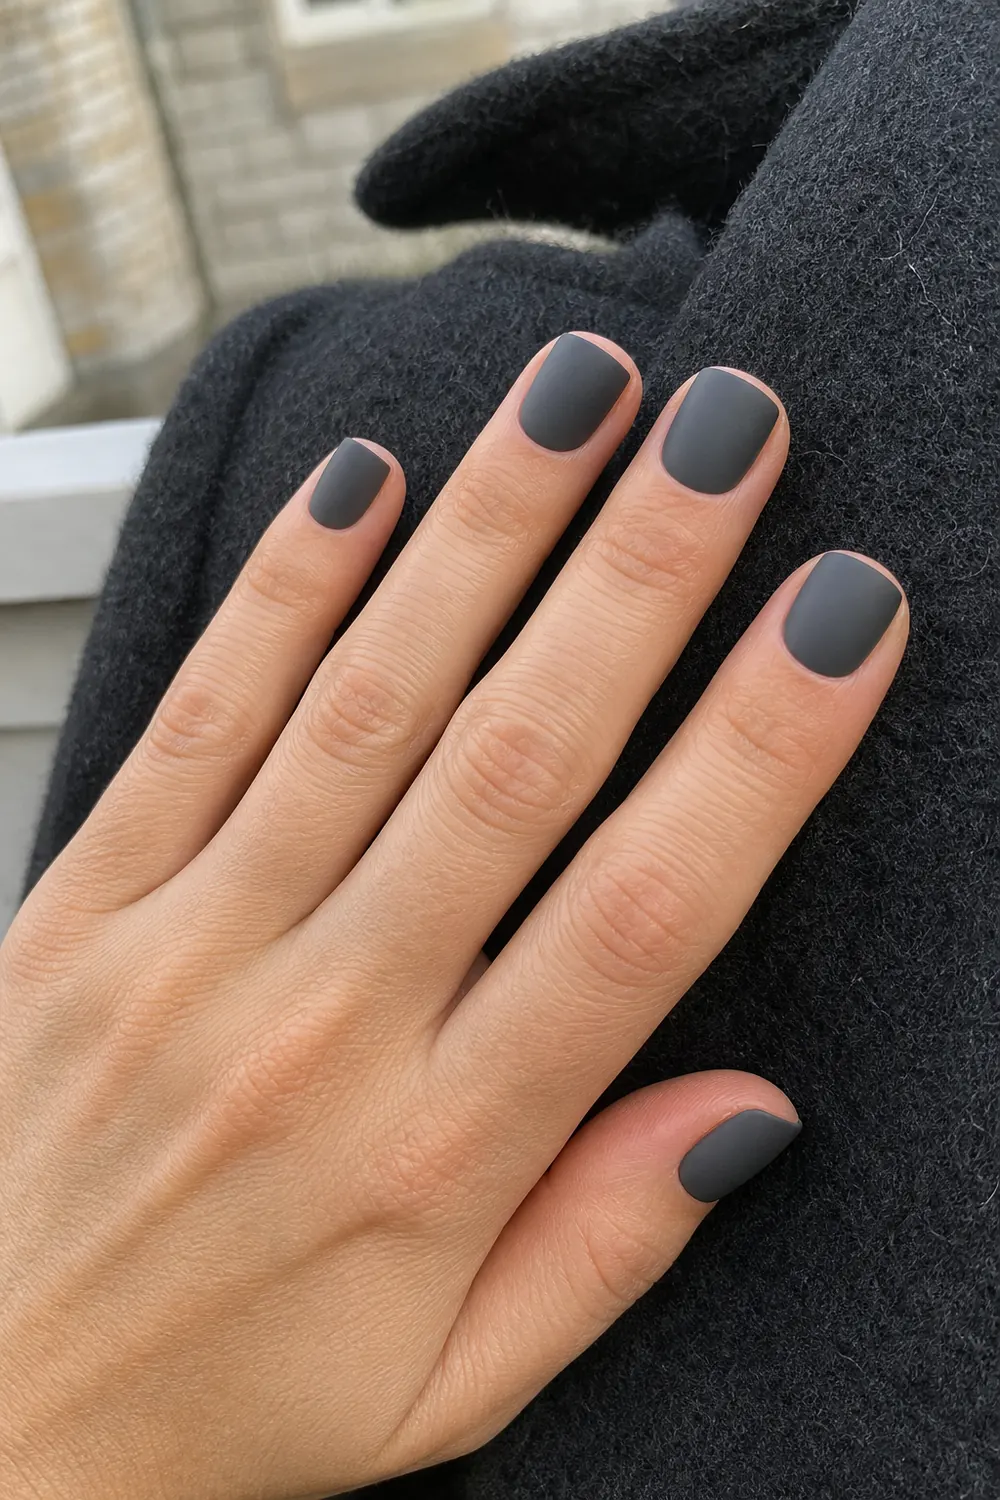
- Difficulty: Easy
- Time: 25 min
- Polish or gel + matte top coat
A matte top coat changes the whole look of a plain color with zero art skills. Paint two thin coats of charcoal gray, let them dry fully, then apply one even coat of matte top coat. Matte shows streaks, so use smooth, even strokes, and try it on dusty rose or olive anytime.
19. Dark Green Cat-Eye Gel
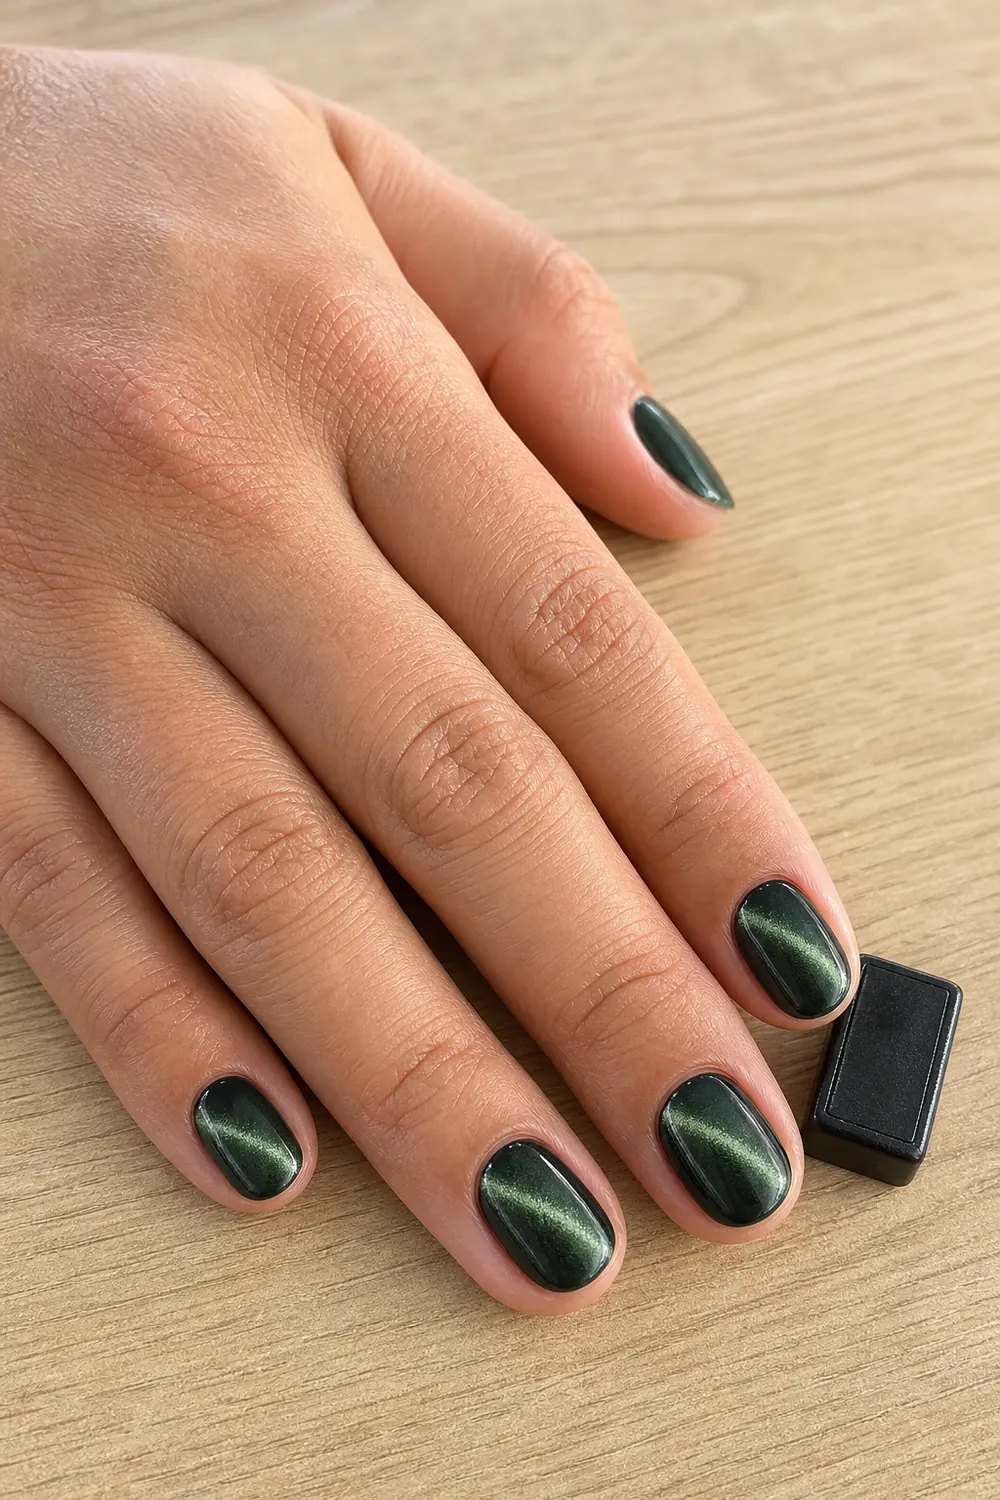
- Difficulty: Easy-medium
- Time: 40 min
- Gel polish + magnet
Cat-eye gel has tiny magnetic particles that you pull into a shimmer line with a magnet. Paint a thin coat, hold the magnet close to the nail for a few seconds right away, then cure quickly before the line spreads. Do one nail at a time, and try it in plum or champagne for a different mood.
20. Milky White Pearly Chrome
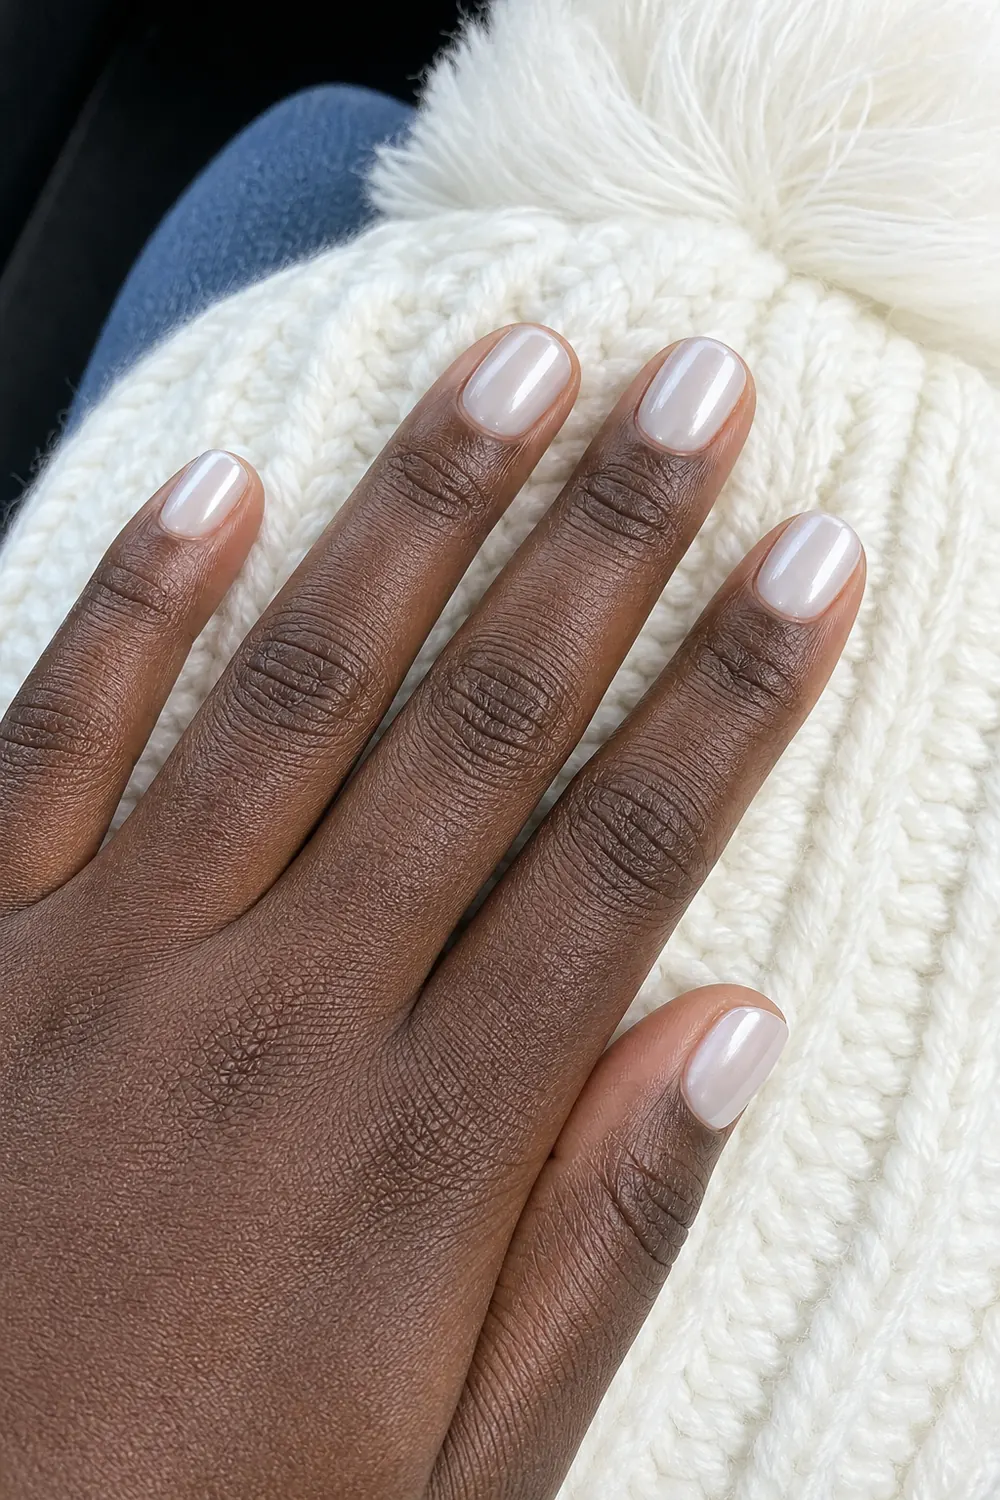
- Difficulty: Easy-medium
- Time: 40–45 min
- Gel polish + chrome powder
A pearly chrome glaze over milky white looks polished and works with any outfit. After the white gel and a no-wipe top coat are cured, rub a little chrome powder onto the nail with a small applicator, brush off the extra, then seal with another layer of top coat and cure. Follow your powder's instructions, since some need the top coat to be fully cured first.
Tools for Beginner Nail Art (and What to Use Instead)
You don’t need a big kit to start. Here’s what each tool does and what you can use if you don’t have it yet:
- Dotting tool. A metal stick with a small ball on each end, used for dots of different sizes. Instead: the round end of a bobby pin for medium dots, a toothpick for tiny ones, and the end of a pen cap or makeup brush handle for big dots.
- Liner brush. A very thin, long brush for French tips and lines. Instead: striping tape for straight lines, or trim a cheap small craft brush down to a few bristles.
- Striping tape. Thin adhesive tape for straight lines and stencils. Instead: regular tape cut into thin strips with scissors, or a sticky note for a straight French tip guide.
- Makeup sponge. Any wedge or cosmetic sponge works for gradients. Instead: a clean kitchen sponge cut into a small piece.
- Cleanup brush. A small flat brush dipped in remover fixes edges and French tip lines. Instead: an orange wood stick or cotton swab, pressed to a sharper point.
Special finishes like cat-eye gel and chrome powder need gel and a lamp. If you’re setting up for gel, the gel nails at home kit guide covers the basics.
Practice Plan: Your First Three Manicures
Trying all 20 designs at once is overwhelming. A simple order to build skills:
- Manicure one: dots. Pick a sheer pink or milky base and try the tiny black polka dots or the one red dot at the cuticle. You’ll learn how much polish to pick up and how to keep dots round.
- Manicure two: lines and tips. Try the single silver stripe with striping tape, then a thin French tip on a couple of nails. Clean up the edges with a small brush before top coat.
- Manicure three: one special finish. Try a sponge ombre with polish, or cat eye or chrome if you use gel. These look the most advanced but take very little freehand skill.
After that, mix techniques: dotted French tips with a glitter accent, or a matte base with glossy dots. If you use gel and want holiday ideas that build on these same skills, see easy DIY Christmas gel nails, and for more cold-weather colors to try them in, see short winter nails.
FAQ
What is the easiest nail art for beginners with short nails?
Dots are the easiest. A few tiny dots on a sheer base or one dot near the cuticle need only a dotting tool, a bobby pin or a toothpick. Striping tape lines and nail stickers are the next easiest.
Can I do these simple nail designs for beginners with regular polish?
Yes, almost all of them. Dots, lines, French tips, sponge ombre, stickers and matte top coat work with regular polish. Cat-eye and chrome finishes are gel techniques and need an LED/UV lamp.
How do I keep nail art from smudging?
Let the base dry or cure before adding art, let the art dry, then float the top coat over it without pressing the brush down. Thin coats dry faster and smudge less.
What tools do I need for a nail tutorial for beginners?
A base and top coat, a few colors, a dotting tool (or bobby pin), a thin liner brush or striping tape and a small cleanup brush with remover. Add a makeup sponge, stickers or a matte top coat when you want to try more techniques.